
 Sign Out


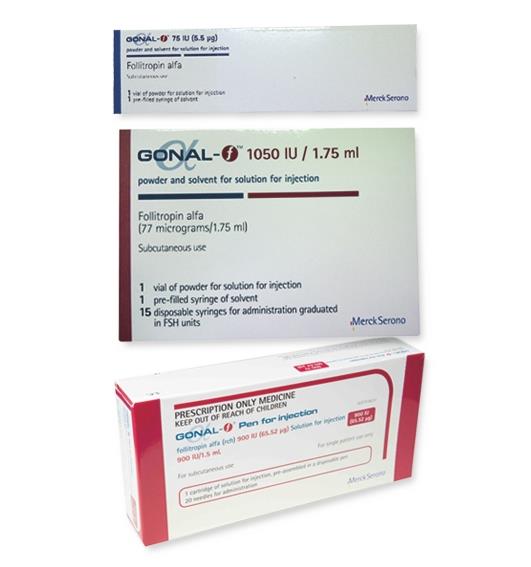
IF YOU ADMINISTER GONAL-F TO YOURSELF, PLEASE READ THE FOLLOWING INSTRUCTIONS CAREFULLY: 75 IU: 1. Wash your hands and find a clean area: It is important that your hands and the items you use be as clean as possible.
A good place is a clean table or kitchen surface.
2. Get together everything you need and lay them out: 1 vial containing the solvent (the clear liquid); 1 vial containing GONAL-f (the white powder).
Not provided in the pack: 2 alcohol swabs, 1 empty syringe for injection, 1 needle for preparation, 1 fine bore needle for injection under the skin, 1 sharp container.
3. Preparing the solution: Remove the protective cap from the solvent vial.
Attach the needle for preparation to the empty syringe for injection.
Draw up some air into the syringe by pulling the plunger to approximately the 1 ml mark.
Insert the needle into the solvent vial and push the plunger to expel the air.
Turn the vial upside down and gently draw up all the solvent.
Remove the syringe from the vial and set it down carefully. Do not touch the needle and do not allow the needle to touch any surface.
(If you have been prescribed more than one vial of GONAL-f, slowly re-inject the solution into another powder vial, until you have the prescribed number of powder vials dissolved in the solution. If you have been prescribed lutropin alfa in addition to GONAL-f, you may also mix the two medicines as an alternative to injecting each medicine separately. After dissolving the lutropin alfa powder, draw the solution back into the syringe and re-inject it into the vial containing GONAL-f. Once the powder has dissolved, draw the solution back into the syringe. Inspect for particles, and do not use if the solution is not clear. Up to three containers of powder may be dissolved in 1 ml of solvent.)
4. Getting ready the syringe for injection: Change the needle for the fine bore needle.
Remove any air bubbles: If you see air bubbles in the syringe, hold the syringe with the needle pointing upwards and gently flick the syringe until all the air collects at the top. Push the plunger until the air bubbles are gone.
5. Injecting the dose: Immediately inject the solution: Your doctor or nurse will have already advised you where to inject (e.g. tummy, front of thigh). To minimise skin irritation, select a different injection site each day.
Clean the chosen skin area with an alcohol swab using a circular motion.
Firmly pinch the skin together and insert the needle at a 45° to 90° angle using a dart-like motion.
Inject under the skin by pushing gently the plunger, as you were taught. Do not inject directly into a vein. Take as much time as you need to inject all the solution.
Immediately withdraw the needle and clean the skin with an alcohol swab using a circular motion.
6. After the injection: Dispose of all used items: Once you have finished your injection, immediately discard all needles and empty glass containers safely preferably in the sharp container. Any unused solution must be discarded.
1,050 IU/1.75 mL: 1. Wash your hands and find a clean area: It is important that your hands and the items you use be as clean as possible.
A good place is a clean table or kitchen surface.
2. Get together everything you need and lay them out: 2 alcohol swabs; The pre-filled syringe containing the solvent (the clear liquid); The vial containing GONAL-f (the white powder); An empty syringe for injection.
3. Preparing the solution: Remove the protective caps from the powder via land from the pre-filled syringe.
Take your pre-filled syringe, insert the needle into the powder vial and slowly inject all the solvent into the vial containing the powder.
Remove the syringe from the vial and throw it away (put the protective cap to avoid injuries).
This vial contains several doses of GONAL-f. You will have to keep it several days and only draw the prescribed dose every day.
4. Getting ready the syringe for injection: Swirl gently the vial of GONAL-f prepared in step 3, do not shake. Check that the solution is clear and does not contain any particles.
Take the syringe for injection and fill it with air by pulling the plunger to the correct dose in International Units (IU FSH).
Insert the needle into the vial, turn the vial upside down and inject the air into the vial.
Draw the prescribed dose of GONAL-f into the syringe for administration by pulling the plunger until it reaches the correct dose in IU FSH.
5. Removing air bubbles: If you see air bubbles in the syringe, hold the syringe with the needle pointing upwards and gently flick the syringe until all the air collects at the top. Push the plunger until the air bubbles are gone.
6. Injecting the dose: Immediately inject the solution:Your doctor or nurse will have already advised you where to inject (e.g. tummy, front of thigh). To minimise skin irritation, select a different injection site each day.
Clean the chosen skin area with an alcohol swab using a circular motion.
Firmly pinch the skin together and insert the needle at a 45° to 90° angle using a dart-like motion.
Inject under the skin by pushing gently the plunger, as you were taught. Do not inject directly into a vein. Take as much time as you need to inject all the solution.
Immediately withdraw the needle and clean the skin with an alcohol swab using a circular motion.
7. After the injection: Once you have finished your injection, immediately discard the used syringes safely, preferably in a sharp container.
Store the glass vial with the prepared solution in a safe place. You may need it again. The prepared solution is for your use alone and must not be given to other patients.
For further injections with the prepared solution of GONAL-f, repeat steps 4. to 7.
300 IU/0.5 mL and 900 IU/1.5 mL: Before you start: 1. Wash your hands: It is important that your hands and the things you use to get your pen ready are as clean as possible.
2. Find a clean area: A good place is a clean table or kitchen surface.
3. Get together everything you need and lay them out: 2 alcohol swabs, the pre-filled pen, a needle.
Please note: The scale that can be seen through the liquid holder shows how much of the medicine is left in the pen. Do not use it to set the dose.
Getting a new pen ready for the first time: 1. Take off the pen cap.
2. Put on a needle: Take a new needle - only use the "single-use" needles supplied for the GONAL-f pre-filled pen.
Check that the peel-off seal on the outer needle cap is not damaged or loose. If it is damaged or loose, do not use the needle and get another. Throw away the unused needle with the outer needle cap still on, in your household rubbish.
Pull off the peel-off seal.
Hold the outer needle cap firmly.
Press the threaded tip of the pen into the outer needle cap and twist it clockwise.
Twist it until it is firmly fixed.
3. Getting the liquid in the pen ready for use (also called "priming" the pen): Set the dose arrow to 37.5 using the black dose selection dial - look for the small dot.
Pull out the injection button as far as it will go.
Take off the outer needle cap.
Then take off the inner needle cap and hold the pen with the needle pointing upwards.
Tap the liquid holder gently with your finger. This lets any air bubbles rise up towards the needle.
With the needle still pointing upwards, press the injection button fully. A drop of liquid will appear at the tip of the needle; this shows that your pen is ready for injection. This liquid at the needle tip is the "over-fill" from the pen.
If no liquid appears the first time, pull out the injection button as far as it will go and press the button again until a drop of liquid appears.
Setting the dose: 1. Set the dose you need by turning the black dose dial in either direction: Turn the dial until the arrow is pointing to the dose you need. The black dial lets you set the dose in steps of 37.5 IU. The smallest dose is 37.5 IU and the largest is 300 IU.
Important: carefully check the dose dial before moving on to the next step. This is because the dose cannot be changed after you have pulled out the injection button.
If you realise that you have set and loaded a wrong dose, do not inject it. Discard the wrong dose in the sink and set the dose again.
2. Once you have set your dose, load the dose by pulling the injection button out as far as it will go: Take care to pull the button straight and not to twist it out - twisting it might change the dose which you have set.
When the injection button is pulled out, the loaded dose is shown on the red dose control scale which appears. It is shown by the last mark (flat arrow).
Important: check the red dose control scale on the injection button to make sure that the full dose has been loaded.
If the loaded dose is lower than the set dose, then there was not enough medicine left in your pen for this dose. If this happens, follow the instructions given at the "More information about the red dose control scale" as follows.
If the same dose is required every time, then the dose arrow can be left pointing at the same position on the dose dial.
Injecting the dose: 1. Choose the place to give the injection: where your doctor or nurse has told you (e.g. tummy, front of thigh). To minimise skin irritation, select a different injection site each day.
2. Clean the skin where the injection is going by wiping with an alcohol swab.
3. Inject the dose as you were told by your doctor or nurse: Put the needle into the skin and press the injection button as far as it will go.
Check that the grey marker on the injection button is no longer visible. This confirms that the dose has been given. You must keep the needle in the skin with the injection button pressed down for at least 10 seconds. After 10 seconds, keep the injection button pressed down, and take the needle out of the skin.
After the injection: 1. Taking off the needle: Take off the needle after each injection. Hold the pen firmly by the liquid holder. Carefully put back the outer needle cap onto the needle. Then grip the outer needle cap and unscrew the needle - do this by turning anticlockwise. Throw away the used needle with outer needle cap on, in your household rubbish. Now put the pen cap back onto the pen.
2. Storing the pen: First take off the needle and put back on the pen cap - as described previously.
Then store the pen in a safe place. It is best to put it back into its original package.
When the pen is empty, throw it away in your household rubbish.
More information about the red dose control scale: When the pen is nearly empty, there may not be enough left for your last dose from that pen. The red dose control scale on the injection button is for you to check whether there is enough for your last dose from the pen. It can only be pulled out as far as the mark (flat arrow) showing the amount of medicine left in the pen.
If the loaded dose is not enough to complete your injection, you can do one of two things: Either inject the part dose - what is left in the pen. If you do this, write down straight away how much you have injected. Then give the rest of your dose from a new pen. Or throw away the pen and inject the full dose using a new pen.


UserName
Profession Email
Profession Email