
 Sign Out


SoloStar is a pre-filled pen for the injection of insulin. Your doctor has decided that SoloStar is appropriate for you based on your ability to handle SoloStar. Talk with your doctor, pharmacist or nurse about proper injection technique before using SoloStar.
Read these instructions carefully before using your SoloStar. If you are not able to use SoloStar or follow all the instructions completely on your own, you must use SoloStar only if you have help from a person who is able to follow the instructions completely. Hold the pen as shown in this leaflet. To ensure that you read the dose correctly, hold the pen horizontally, with the needle on the left and the dosage selector to the right.
You can set doses from 1 to 80 units in steps of 1 unit. Each pen contains multiple doses.
Instructions for use: Important information for use of SoloStar: Always attach a new needle before each use. Only use needles that are compatible for use with SoloStar.
Do not select a dose and/or press the injection button without a needle attached.
Always perform the safety test before each injection (see Step 3).
This pen is only for the patient's use. Do not share it with anyone else.
If the injection is given by another person, special caution must be taken by this person to avoid accidental needle injury and transmission of infection.
Never use SoloStar if it is damaged or if the patient is not sure that it is working properly.
Always have a spare SoloStar in case the SoloStar is lost or damaged.
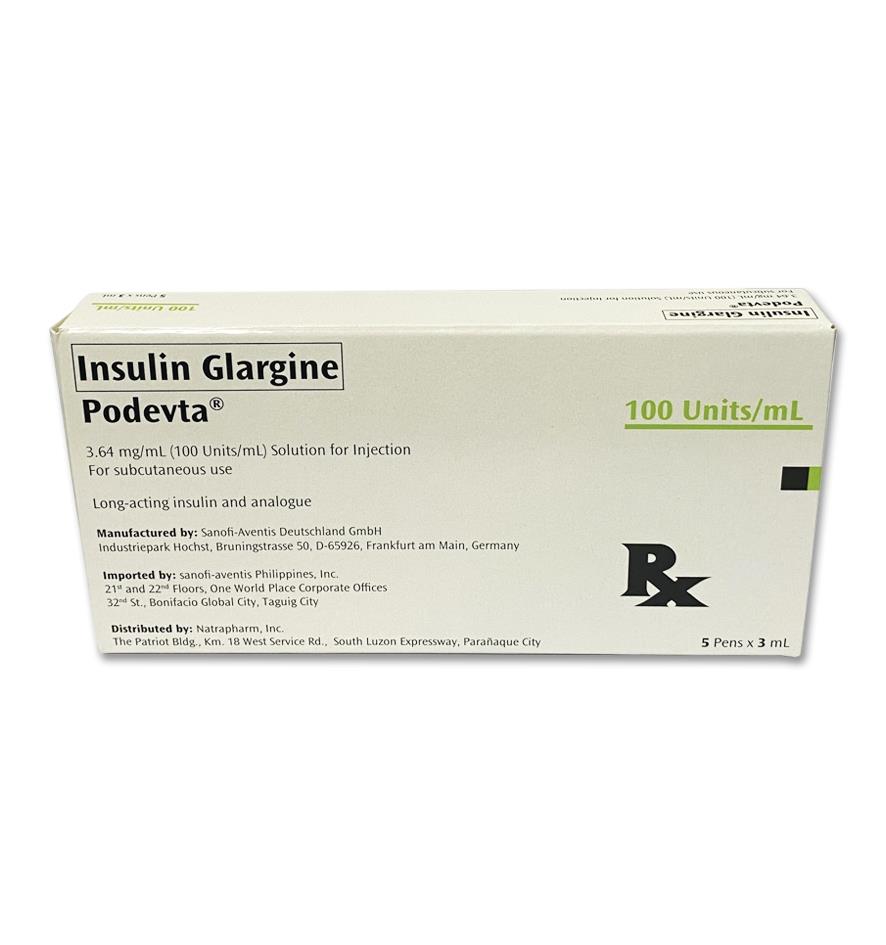
Step 1. Check the insulin: A. Check the label on the SoloStar to make sure the patient has the correct insulin.
The Insulin Glargine (Podevta) is grey with a purple injection button.
B. Take off the pen cap.
C. Check the appearance of the insulin. Insulin Glargine (Podevta) is a clear insulin. Do not use this SoloStar if the insulin is cloudy, coloured or has particles.
Step 2. Attach the needle: Always use a new sterile needle for each injection. This helps prevent contamination, and potential needle blocks.
A. Remove the protective seal from a new needle.
B. Line up the needle with the pen, and keep it straight as attaching it (screw or push on, depending on the needle type).
If the needle is not kept straight while attaching it, it can damage the rubber seal and cause leakage, or break the needle.
Step 3. Perform a Safety test: Always perform the safety test before each injection. This ensures that the patient gets an accurate dose by: ensuring that pen and needle work properly; removing air bubbles.
A. Select a dose of 2 units by turning the dosage selector.
B. Take off the outer needle cap and keep it to remove the used needle after injection. Take off the inner needle cap and discard it.
C. Hold the pen with the needle pointing upwards.
D. Tap the insulin reservoir so that any air bubbles rise up towards the needle.
E. Press the injection button all the way in. Check if insulin comes out of the needle tip.
The patient may has to perform the safety test several times before insulin is seen.
If no insulin comes out, check for air bubbles and repeat the safety test two more times to remove them.
If still no insulin comes out, the needle may be blocked. Change the needle and try again.
If no insulin comes out after changing the needle, the SoloStar may be damaged. Do not use this SoloStar.
Step 4. Select the dose: The patient can set the dose in steps of 1 unit, from a minimum of 1 unit to a maximum of 80 units. If the patient needs a dose greater than 80 units, give it as two or more injections.
A. Check that the dose window shows "0" following the safety test.
B. Select the required dose (for example, the selected dose is 30 units). If turn past the dose, the patient can turn back down.
Do not push the injection button while turning, as insulin will come out.
The patient cannot turn the dosage selector past the number of units left in the pen. Do not force the dosage selector to turn. In this case, either the patient can inject what is remaining in the pen and complete the dose with a new SoloStar or use a new SoloStar for the full dose.
Step 5. Inject the dose: A. Use the injection method as instructed by the doctor, pharmacist or nurse.
B. Insert the needle into the skin.
C. Deliver the dose by pressing the injection button in all the way. The number in the dose window will return to "0" as injecting.
D. Keep the injection button pressed all the way in. Slowly count to 10 before withdrawing the needle from the skin. This ensures that the full dose will be delivered.
The pen plunger moves with each dose. The plunger will reach the end of the cartridge when the total of 300 units of insulin has been used.
Step 6. Remove and discard the needle: Always remove the needle after each injection and store SoloStar without a needle attached.
This helps prevent: Contamination and/or infection; Entry of air into the insulin reservoir and leakage of insulin, which can cause inaccurate dosing.
A. Put the outer needle cap back on the needle, and use it to unscrew the needle from the pen. To reduce the risk of accidental needle injury, never replace the inner needle cap.
If the injection is given by another person, or if an injection to another person, special caution must be taken by this person when removing and disposing of the needle. Follow recommended safety measures for removal and disposal of needles (contact the doctor, pharmacist or nurse) in order to reduce the risk of accidental needle injury and transmission of infectious diseases.
B. Dispose of the needle safely, as instructed by the doctor, pharmacist or nurse.
C. Always put the pen cap back on the pen, then store the pen until the next injection.
Storage instructions: Please check the reverse (insulin) side of this leaflet for instructions on how to store SoloStar.
If the SoloStar is in cool storage, take it out 1 to 2 hours before injecting to allow it to warm up. Cold insulin is more painful to inject.
Discard the used SoloStar as required by the local authorities.
Maintenance: Protect the SoloStar from dust and dirt.
Clean the outside of the SoloStar by wiping it with a damp cloth.
Do not soak, wash or lubricate the pen as this may damage it.
The SoloStar is designed to work accurately and safely. It should be handled with care. Avoid situations where SoloStar might be damaged. If the patient is concerned that the SoloStar may be damaged, use a new one.


UserName
Profession Email
Profession Email